REVIEW · TROMSO
Tromsø: Northern Lights Photography Tour
Book on GetYourGuide →Operated by Northern Soul Adventures · Bookable on GetYourGuide
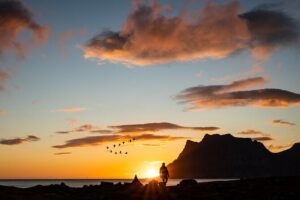
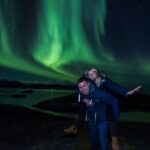
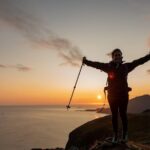
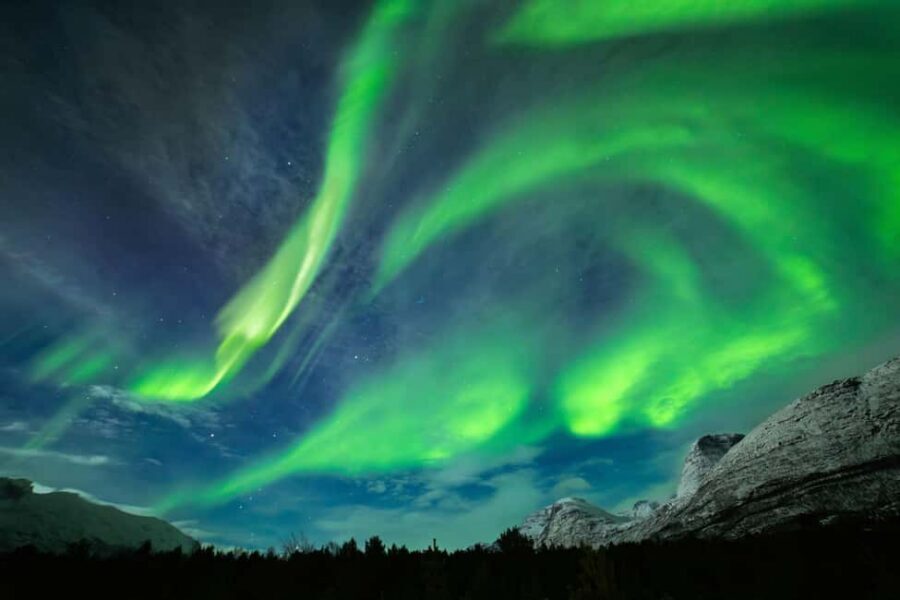
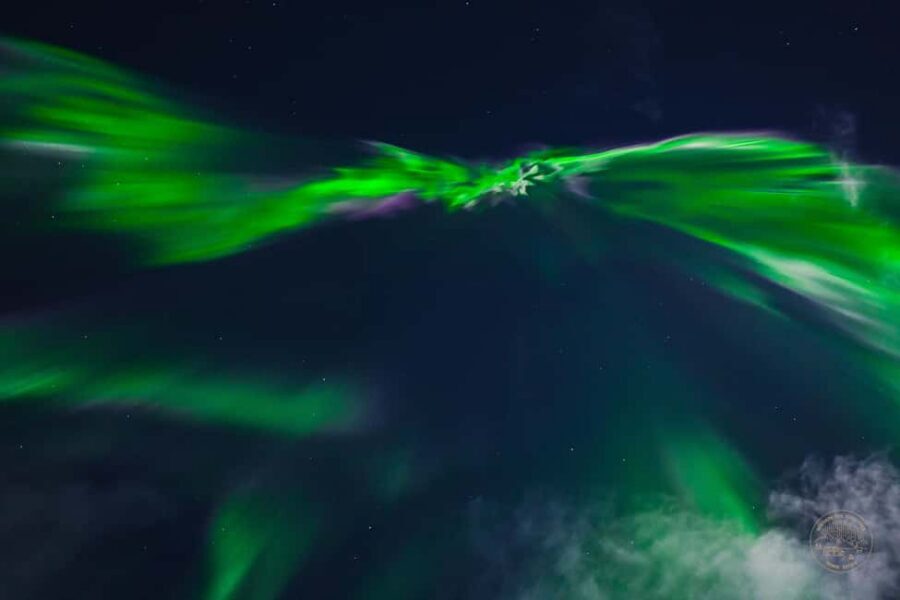
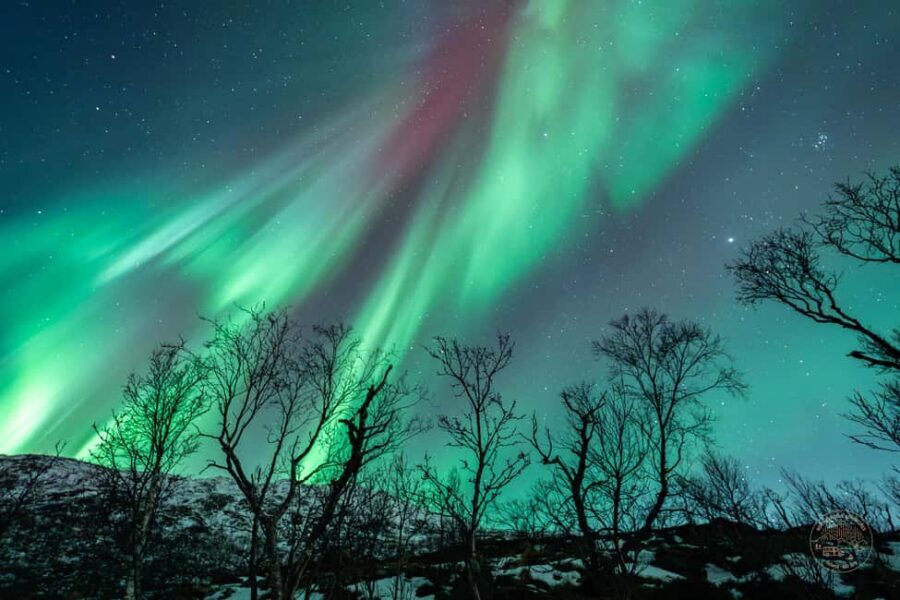
Tromsø’s Northern Lights are famous, but getting the timing and the dark skies right is the real trick. This 6-hour Northern Lights Photography Tour leans hard into that challenge with flexible routing, a small group, and a guide focused on finding clearer patches between microclimates.
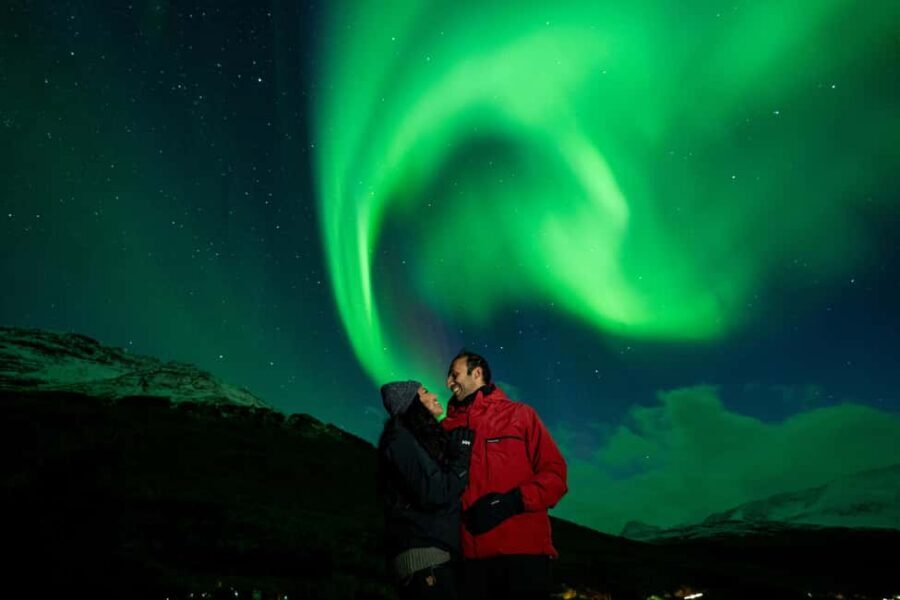
I love how the experience is built for comfort and for photos. You’re given thermal suits, heated insoles, hand warmers, headlamps, and tripods (for your own camera), then you get instruction for shooting the aurora and help along the way.
One thing to consider: the tour length and timing aren’t fixed, and there’s no refund if the lights don’t show. In heavy cloud or snow, patience matters more than gear.
In This Review
- Key highlights at a glance
- Tromsø pickup and getting out of the city glow
- What the ride is like
- The real itinerary: flexible stops, not a single fixed location
- 1) Head out, scan, and adjust
- 2) Arrive at a remote spot and set up for waiting
- 3) Campfire time: soup, hot drinks, and a warm reset
- 4) Long enough for patience to pay off
- Northern Lights photography help that doesn’t leave you guessing
- Tripods, headlamps, and camera survival in cold
- Instruction on how to photograph the aurora
- Read the sky, not just the screen
- Warmth and comfort gear: why it’s not fluff on this tour
- Route strategy: coastal islands, then Finland when needed
- Small-group vibe: smoother, quieter, and easier to help
- The $236 value: what you’re really paying for
- 1) Transport where you need to go
- 2) Comfort gear that changes the outcome
- 3) Photo support you don’t have to work for
- Who should book this Northern Lights photography tour
- Practical tips before you go (so you don’t waste your night)
- Bring what matters
- Dress like you’re outside for hours
- Keep luggage simple
- New moon vs full moon reality check
- Should you book this tour?
- FAQ
- How long is the Tromsø Northern Lights Photography Tour?
- Where do we meet in Tromsø?
- What’s provided for warmth and photography?
- Are professional photos included?
- What if the Northern Lights don’t appear?
- Is this tour suitable for children and mobility needs?
Key highlights at a glance
- Small-group chasing with a guide who keeps moving when conditions change
- Remote viewing to escape Tromsø city glow, sometimes pushing toward Finland
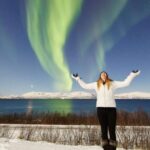
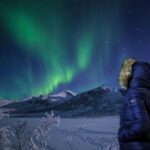
- Thermal suits and heated gear so you can actually stand outside and wait
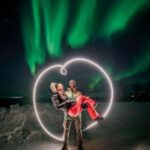
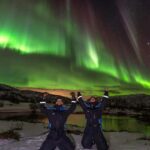
- Photo-first support: tripod guidance plus free professional images after the tour
- Campfire break with locally made soup and warm drinks during the wait
- Professional help on location so your camera can survive Arctic cold and still capture aurora
Tromsø pickup and getting out of the city glow
Your night starts in central Tromsø with a pick-up outside Tourist Shop Tromsø Havn, a white house with blue writing. Stand on the corner facing the city so your guide can find you easily.
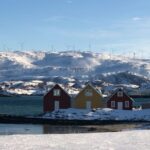
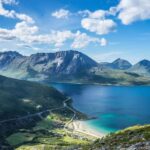
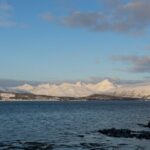
From there, the big value is simple: light pollution and cloud cover. The guides use local knowledge and ongoing conditions monitoring to pick the best viewing spots for that evening. Some nights are a shorter drive to areas like the coastal islands just outside Tromsø. Other nights require a longer run, and several experiences on this tour have gone toward Finland when the weather near Tromsø isn’t cooperating.
Why this matters for you: even if your camera settings are dialed in, you still need dark skies and stable viewing time. The tour’s flexibility is what turns a gamble into a managed chase.
Other northern lights tours we've reviewed in Tromso
What the ride is like
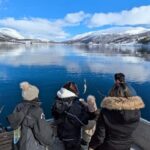
You travel by a comfortable vehicle, and you’re not just being transported. The driver and guide coordinate as conditions evolve. Several guide-driver pairings are praised for spotting opportunities and adjusting quickly, including nights where the aurora activity showed up even while on the way to a final camp spot.
The real itinerary: flexible stops, not a single fixed location
This is not a “sit at Point A and hope” tour. The evening is a series of strategic pauses, based on cloud breaks and aurora likelihood.
Here’s what your flow typically feels like:
1) Head out, scan, and adjust
Early in the evening, you start driving while the guide evaluates the sky. If the night is cooperative, you may get aurora activity en-route. If not, you keep moving until the conditions look promising.
You’ll also be learning as you go. The tour includes photography instructions, and your guide explains what to look for in the sky and how to translate it to your camera.
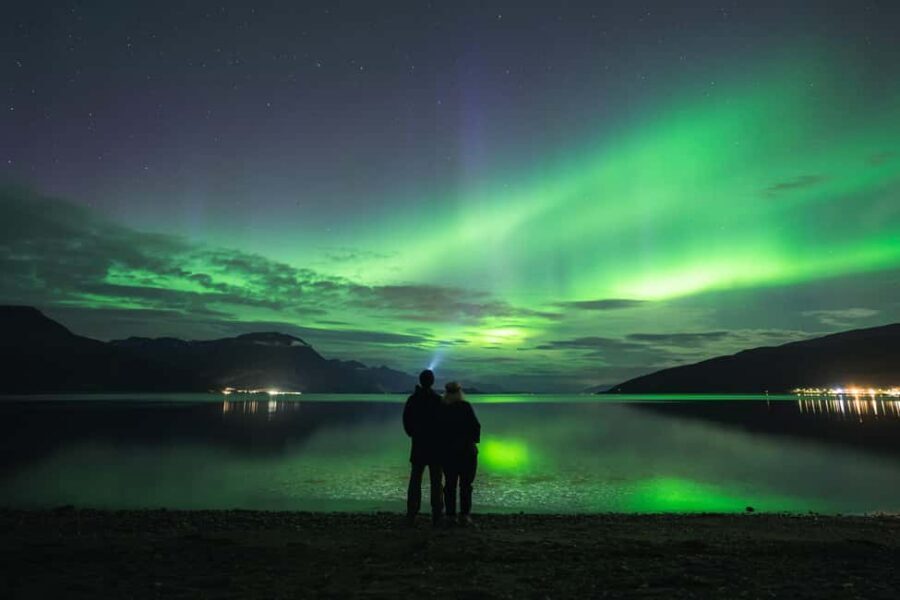
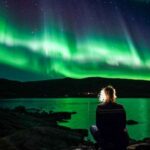
2) Arrive at a remote spot and set up for waiting
Once skies look better, you stop and get set up for a longer viewing window. The goal is to maximize your chances of seeing aurora and to give you time to shoot it properly.
This is usually where the tour switches from “travel mode” to “camp mode”: quiet, dark, and cold-free when you’re dressed correctly.
Other aurora photography tours in Tromso
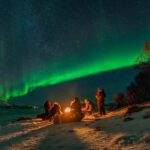
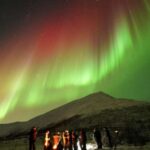
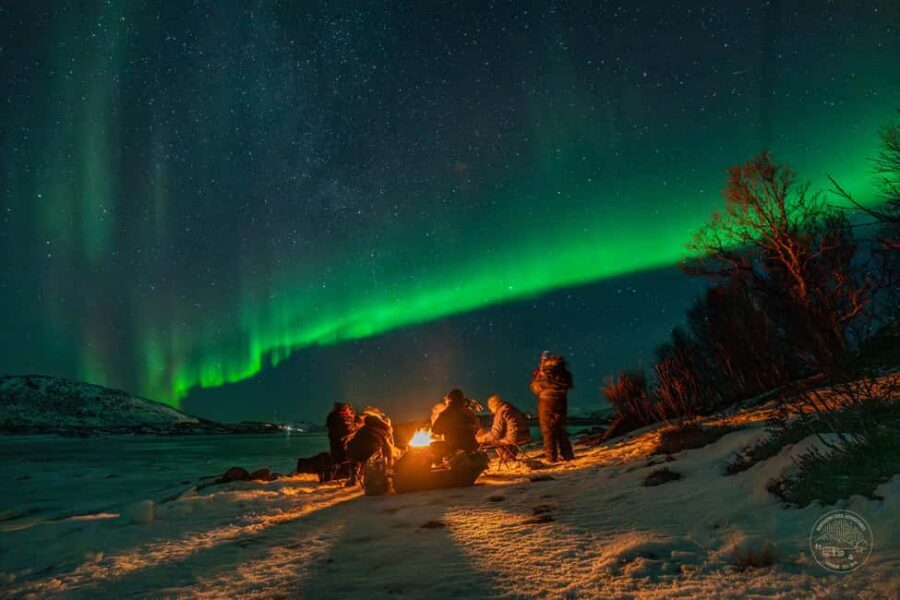
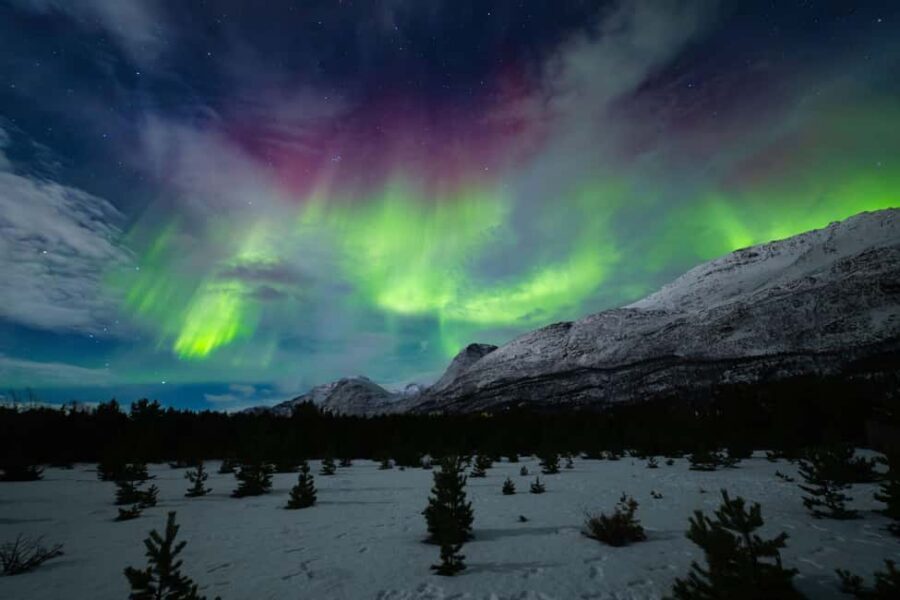
3) Campfire time: soup, hot drinks, and a warm reset
When the group is settled, you get a cozy break around the campfire with locally made soup, plus cookies and warm drinks like tea, coffee, and hot chocolate. It’s not just comfort; it helps you stay focused. Aurora nights can be long, and waiting outside in the Arctic is easier when you’re fed and warm.
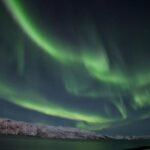
Some nights include the aurora showing up in bursts. When that happens, expect the guide to keep an eye on the sky and reposition or re-check nearby spots if conditions allow.
4) Long enough for patience to pay off
A common theme in the feedback is that the guides keep working the chase even if the first stretch is cloudy, windy, or slow. You might see brief hints first, then a more obvious display later. One extra benefit of the tour format: you aren’t stuck at a single spot while the sky clears somewhere else.
At the end, you return to Tromsø and get drop-off at hotel/accommodation in the city centre (main island of Tromsø). The return time depends on where the aurora is happening that night, which is why the tour is listed as about 6 hours, but in practice it can run 6–9 hours.
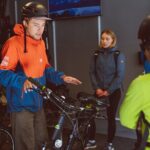
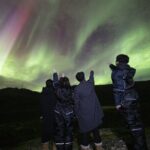
Northern Lights photography help that doesn’t leave you guessing
This tour is explicitly a photography tour, but it’s not only for people who already know their settings.
Tripods, headlamps, and camera survival in cold
You’ll get tripods and headlamps. A key detail: the provided tripods aren’t suitable for mobile phones. If you’re shooting with a smartphone, plan on it being more of a luck-and-light-pollution compromise than a guaranteed setup.
The cold is also real. Tripods, camera buttons, and gloves don’t mix well in snow and wind. The tour helps you by supplying thermal suits and heated foot support, plus hand warmers. Multiple experiences emphasize that guides help when gear freezes up or when you need help adjusting your setup.
Instruction on how to photograph the aurora
You get instructions on how to photograph the Aurora, and the guide is available to help during the evening. That combination matters because the aurora isn’t like a normal night photo. You need the right balance of shutter speed, aperture, and ISO, and you also need your camera to stay steady.
A few names have shown up repeatedly for their photo skills and patience, including Joaquin, Filip, Lucas, Bogdan, Thomas, Anna, Ana, and Mathias. Even when the aurora is faint, the guidance seems to help people get results, including situations where the sky looked quiet to the naked eye but cameras captured more activity.
Read the sky, not just the screen
The tour also gives you context about what you’re seeing. A helpful reality check you’ll hear is that cameras can show northern lights differently than your eyes can. That’s good to know before you panic when your first check looks underwhelming.
Warmth and comfort gear: why it’s not fluff on this tour
In Tromsø, the biggest threat to a great aurora photo isn’t your camera. It’s getting cold enough that you stop moving, stop focusing, or stop enjoying the wait.
This tour provides:
- Thermal suits
- Hand warmers
- Heated insoles for your boots
- Headlamps
- Warm food and drinks
If you’ve ever tried to stand still for hours in deep winter, you know how fast “I can handle the cold” turns into “I can’t feel my fingers.” The supplied warm gear is what lets you focus on composition and settings instead of survival.
Also, plan your expectations around bodily needs. Bathroom facilities are limited. It’s smart to go before you settle in for longer viewing blocks.
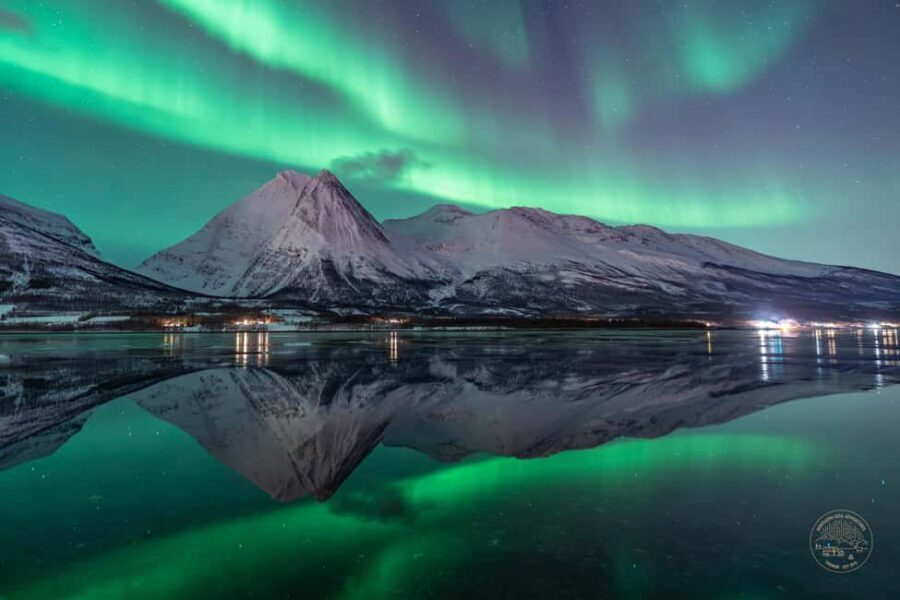
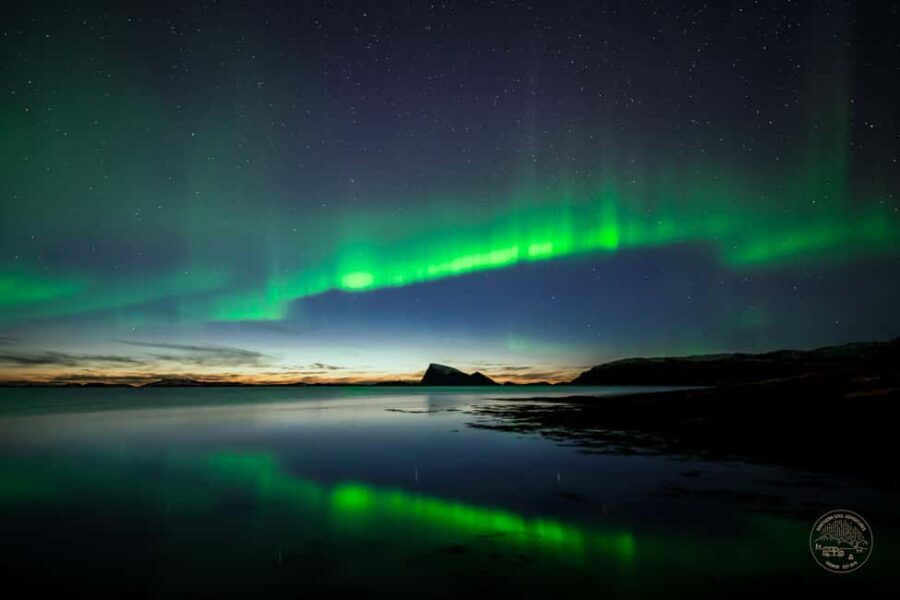
Route strategy: coastal islands, then Finland when needed
The tour’s success depends on chasing microclimates—those quick shifts where one side of the region clears while another stays cloudy.
Sometimes you start close: short drives to coastal areas just outside Tromsø where darkness improves. Other times, you go farther, including routes toward Finland when the sky near Tromsø won’t cooperate. Several guides are specifically praised for driving long distances when forecasts or conditions look rough.
For you, this is the practical advantage:
- You’re not locked into one area that might be socked in.
- You’re maximizing the chance of clear skies each time you stop.
- You can still enjoy the night even if the aurora is delayed, because the hunt is active.
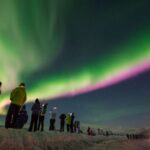
Small-group vibe: smoother, quieter, and easier to help
Group size is a major part of why this tour gets such strong feedback. A small group means fewer people fighting for tripod space, more time for the guide to check who needs help, and less chaos when the lights finally show up.
The photo support also fits the small-group format. Guides have time to help people set up, adjust, and troubleshoot frozen gear. One review even points out guides helping with a frozen camera problem—exactly the kind of issue that matters when temperatures are brutal.
If you like a tour that feels like a guided night with people you can talk to, this is that style. You’ll also get campfire warmth and time for relaxed conversation while you wait.
The $236 value: what you’re really paying for
At $236 per person for a roughly 6-hour tour, you’re paying for three things that add up fast in the Arctic:
1) Transport where you need to go
Remote aurora spots aren’t convenient to reach on your own in winter. The tour includes comfortable vehicle transport and a guide-driver team that’s actively moving when conditions change.
2) Comfort gear that changes the outcome
Thermal suits, heated insoles, and hand warmers sound like extras until you’re outside for hours. Comfort isn’t just nice—it keeps you functional for photography.
3) Photo support you don’t have to work for
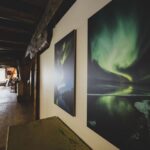
You get instructions, help with your own camera, and you receive free professional photos from the tour in web resolution. That takes pressure off you having to nail everything yourself.
And because the aurora is weather-dependent, the best value is getting the best odds each time you stop. The route strategy is built to maximize clear-sky chances, not just to show you a distant scenic point.
Who should book this Northern Lights photography tour
This tour is a strong match if:
- You want a small-group aurora hunt instead of a big bus crowd.
- You plan to shoot photos and want tripod support and guidance.
- You like the idea of waiting outside with a campfire meal and warm drinks.
- You can stand on snowy or slippery terrain and handle changing plans.
It might not be the best fit if:
- You need guaranteed aurora visibility. Even with great guiding, you can’t force clear skies.
- You prefer a very fixed schedule. The tour duration can shift depending on aurora activity.
- You have mobility constraints. The tour is listed as not suitable for people with mobility impairments.
- You’re traveling with younger kids. It’s not suitable for children under 8, and the minimum height listed is 135 cm.
Practical tips before you go (so you don’t waste your night)
Here are the basics that will help you get the most from the evening:
Bring what matters
Bring passport or ID, gloves, weather-appropriate clothing, waterproof shoes, and warm shoes.
Dress like you’re outside for hours
Even with thermal suits, you’ll be outside waiting. Gloves matter. Waterproof footwear matters. Layers matter.
Keep luggage simple
Luggage or large bags aren’t allowed. Travel light so you can get comfortable quickly.
New moon vs full moon reality check
Darkest skies usually mean stronger-looking aurora and more stars. Around new moon, the sky tends to be darker. Around full moon, the aurora may look fainter, but the brightness can make the surroundings look extra dramatic in photos. Either way, the guide’s job is to work with what nature gives that night.
Should you book this tour?
Yes, if your priority is a guided aurora chase with real photo help, warmth that lets you stay outside, and a small-group setup. The tour’s strongest promise is the hunt itself: flexible routing, active sky monitoring, and a guide who keeps working the conditions until the sky cooperates.
Skip it only if you need a guaranteed lights show or if cold-weather standing isn’t realistic for you. Also think twice if you want to avoid rough-terrain conditions, limited bathroom access, and a schedule that can run closer to 6–9 hours depending on what the sky does.
FAQ
How long is the Tromsø Northern Lights Photography Tour?
It’s listed as 6 hours, but it can run about 6–9 hours depending on aurora activity and conditions. There is no set duration.
Where do we meet in Tromsø?
Meet outside Tourist Shop Tromsø Havn, a white house with blue writing. Stand on the corner facing toward the city, and your guide will meet you there.
What’s provided for warmth and photography?
You’ll be provided thermal suits, hand warmers, heated insoles, headlamps, and tripods (tripods are not suitable for mobile phones). The tour also includes instructions on photographing the Aurora.
Are professional photos included?
Yes. You receive free professional photos from the tour in web resolution.
What if the Northern Lights don’t appear?
Refunds are not offered if the Northern Lights are not visible.
Is this tour suitable for children and mobility needs?
It’s not suitable for children under 8, and it lists a minimum height of 135 cm. It’s also listed as not suitable for people with mobility impairments.